Build your first bowtie diagram
In this tutorial, we’ll show you how to create and rename a diagram and add, edit, delete and clone elements.
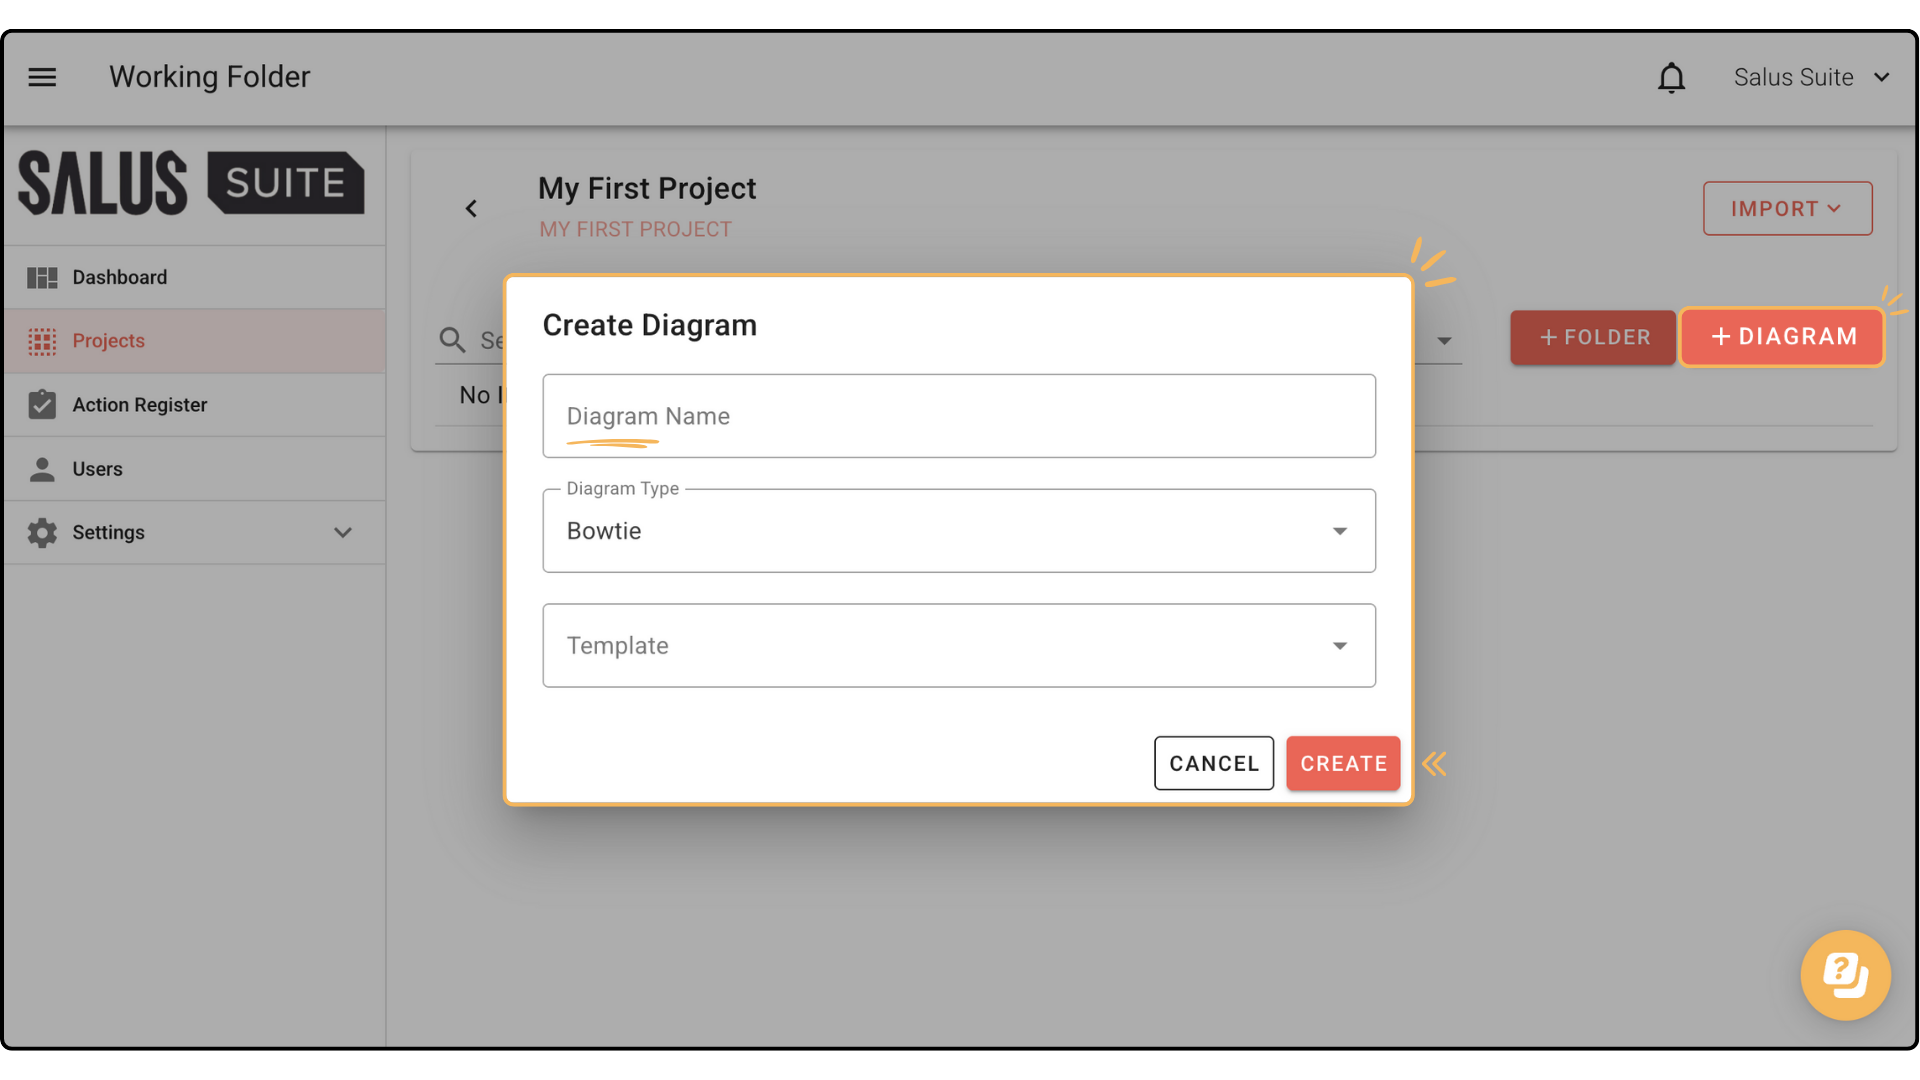
Step 1: In a project, click + NEW DIAGRAM. Enter a Diagram Name, select Bowtie in Diagram Type and choose a template if you have one - otherwise leave the field blank. Click CREATE.
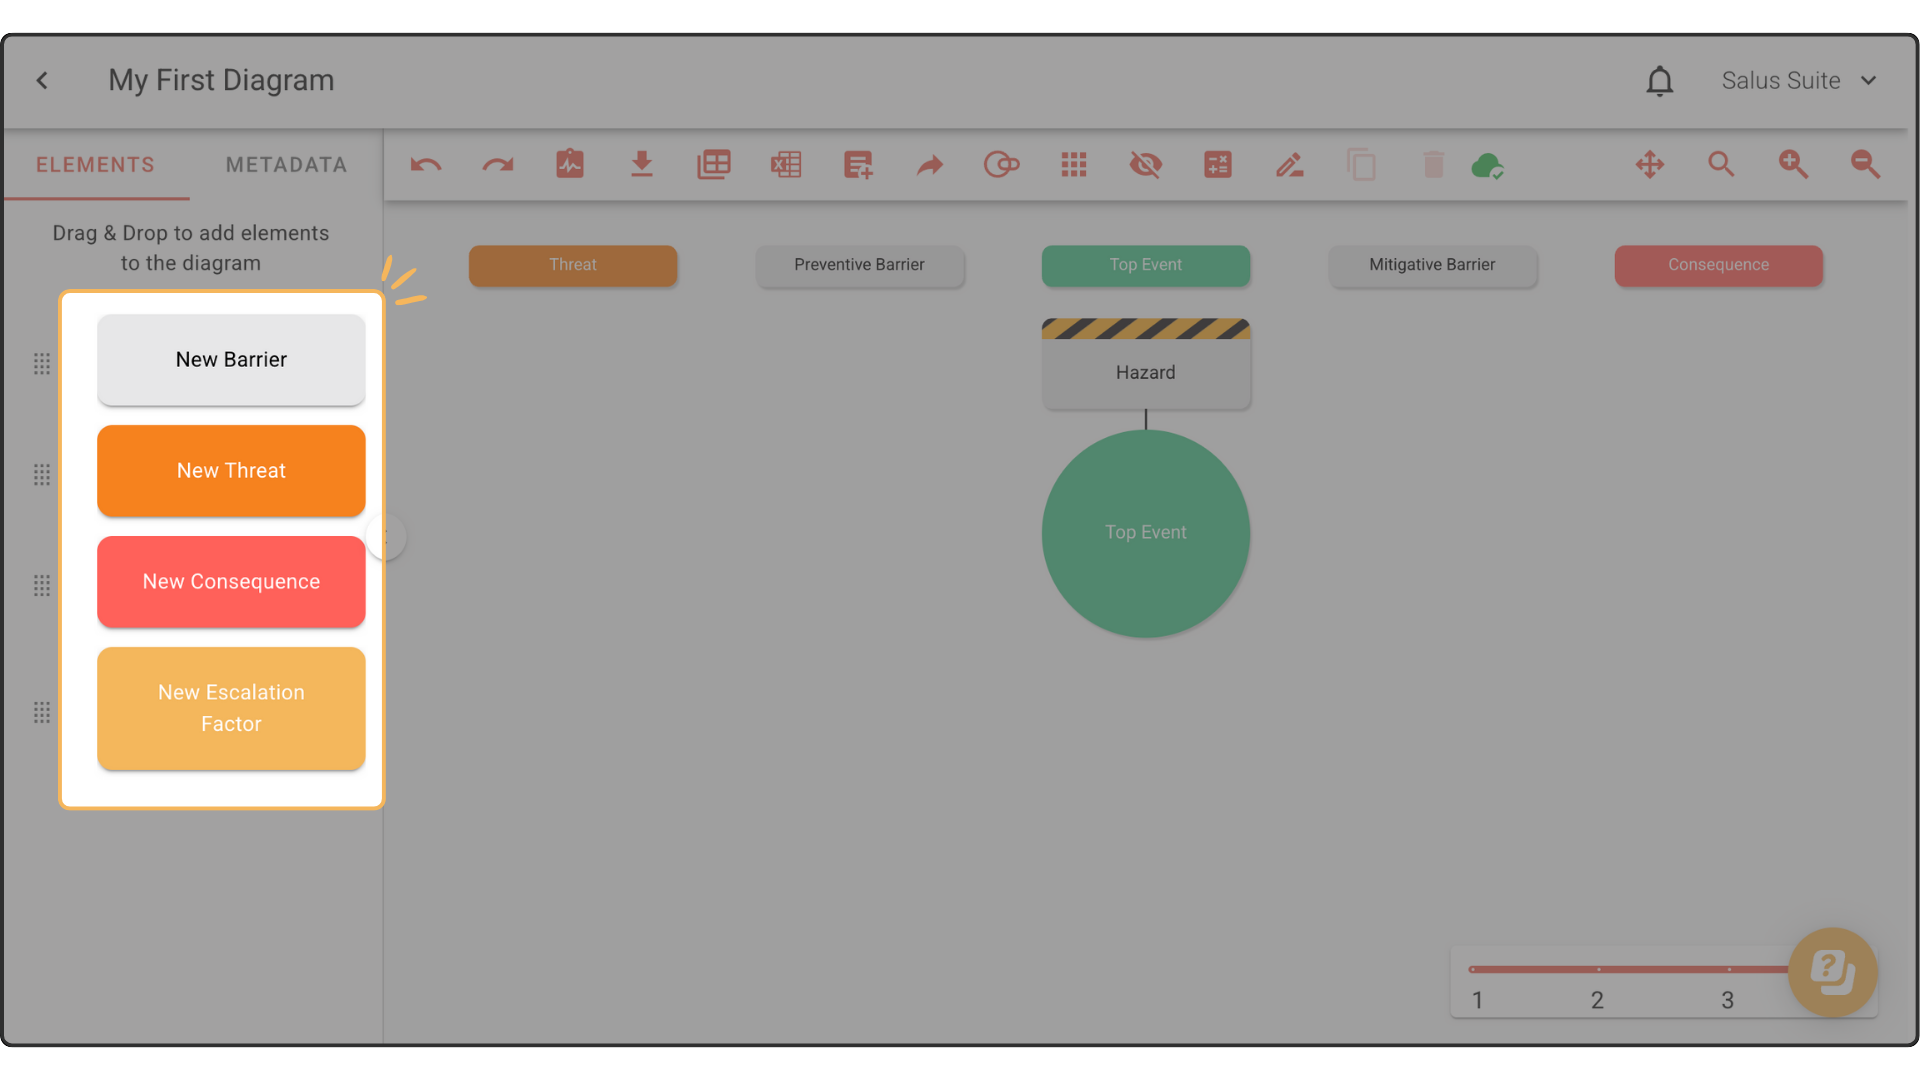
Step 2: Drag elements from the left of the Diagram Editor into the diagram. Start by placing a Threat on the left or a Consequence on the right, then build out your bowtie by adding barriers to both sides.
When dropping elements in, watch for the dashed line that appears. Drop within this zone, using the black bar as a placement indicator. The Hazard and Top Event are placed in the diagram by default.
Step 3: To edit an element, double-click it and rename it.
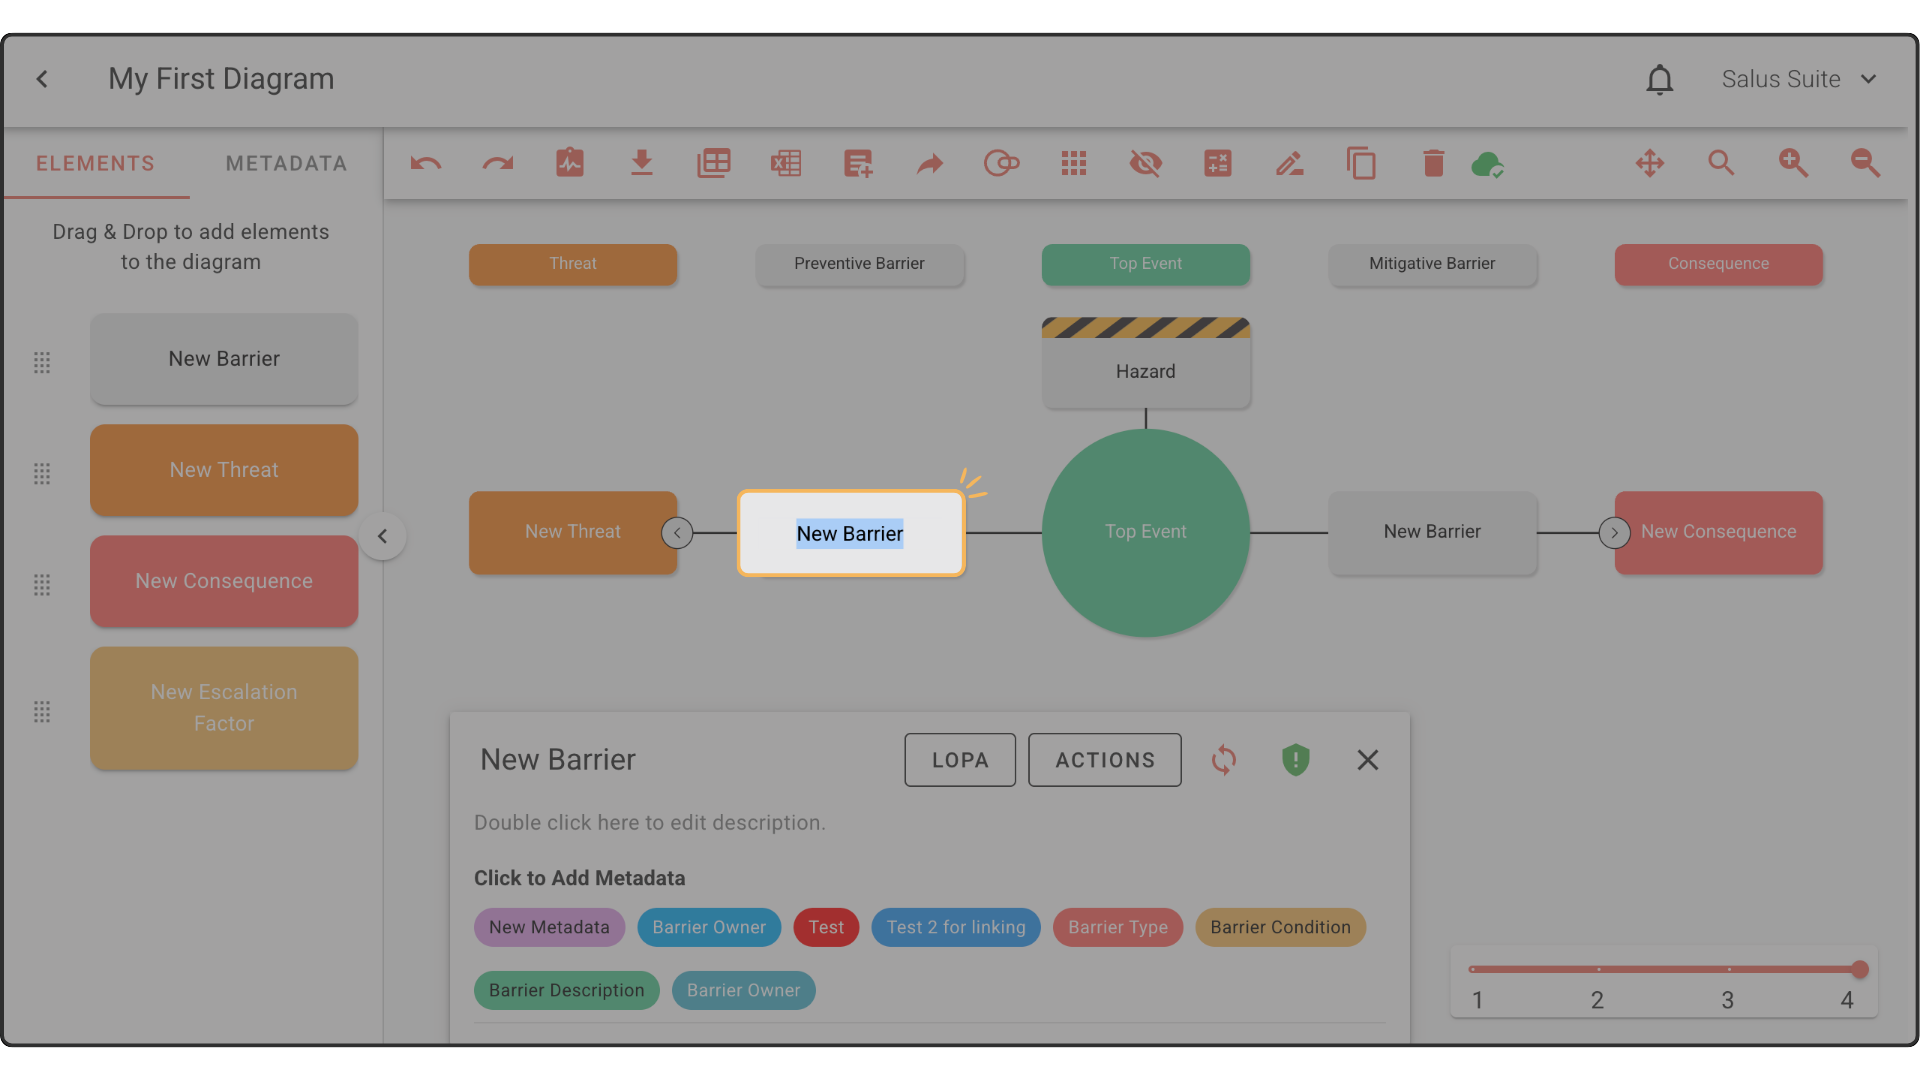
You can also edit an element in the Element Description Box at the bottom of the Diagram Editor, where you can rename it, add a description, add metadata, add actions and more.

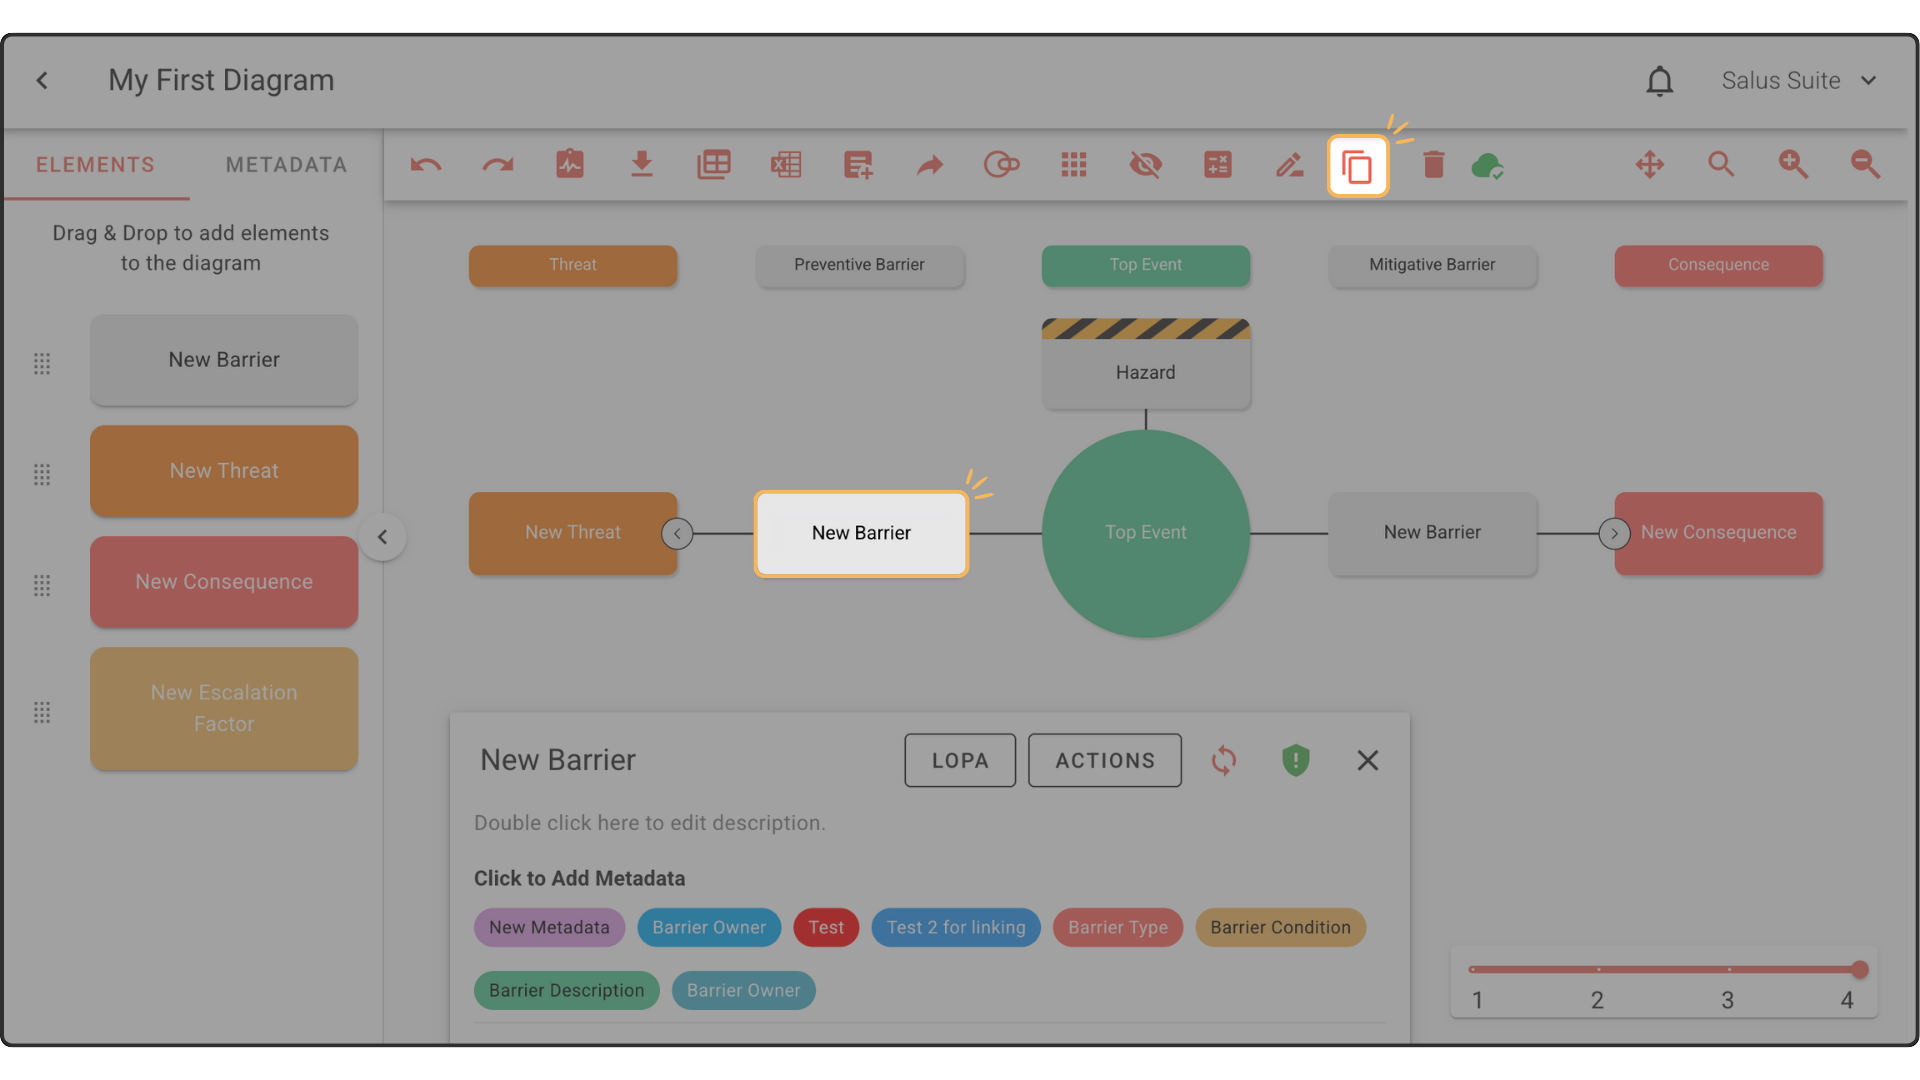
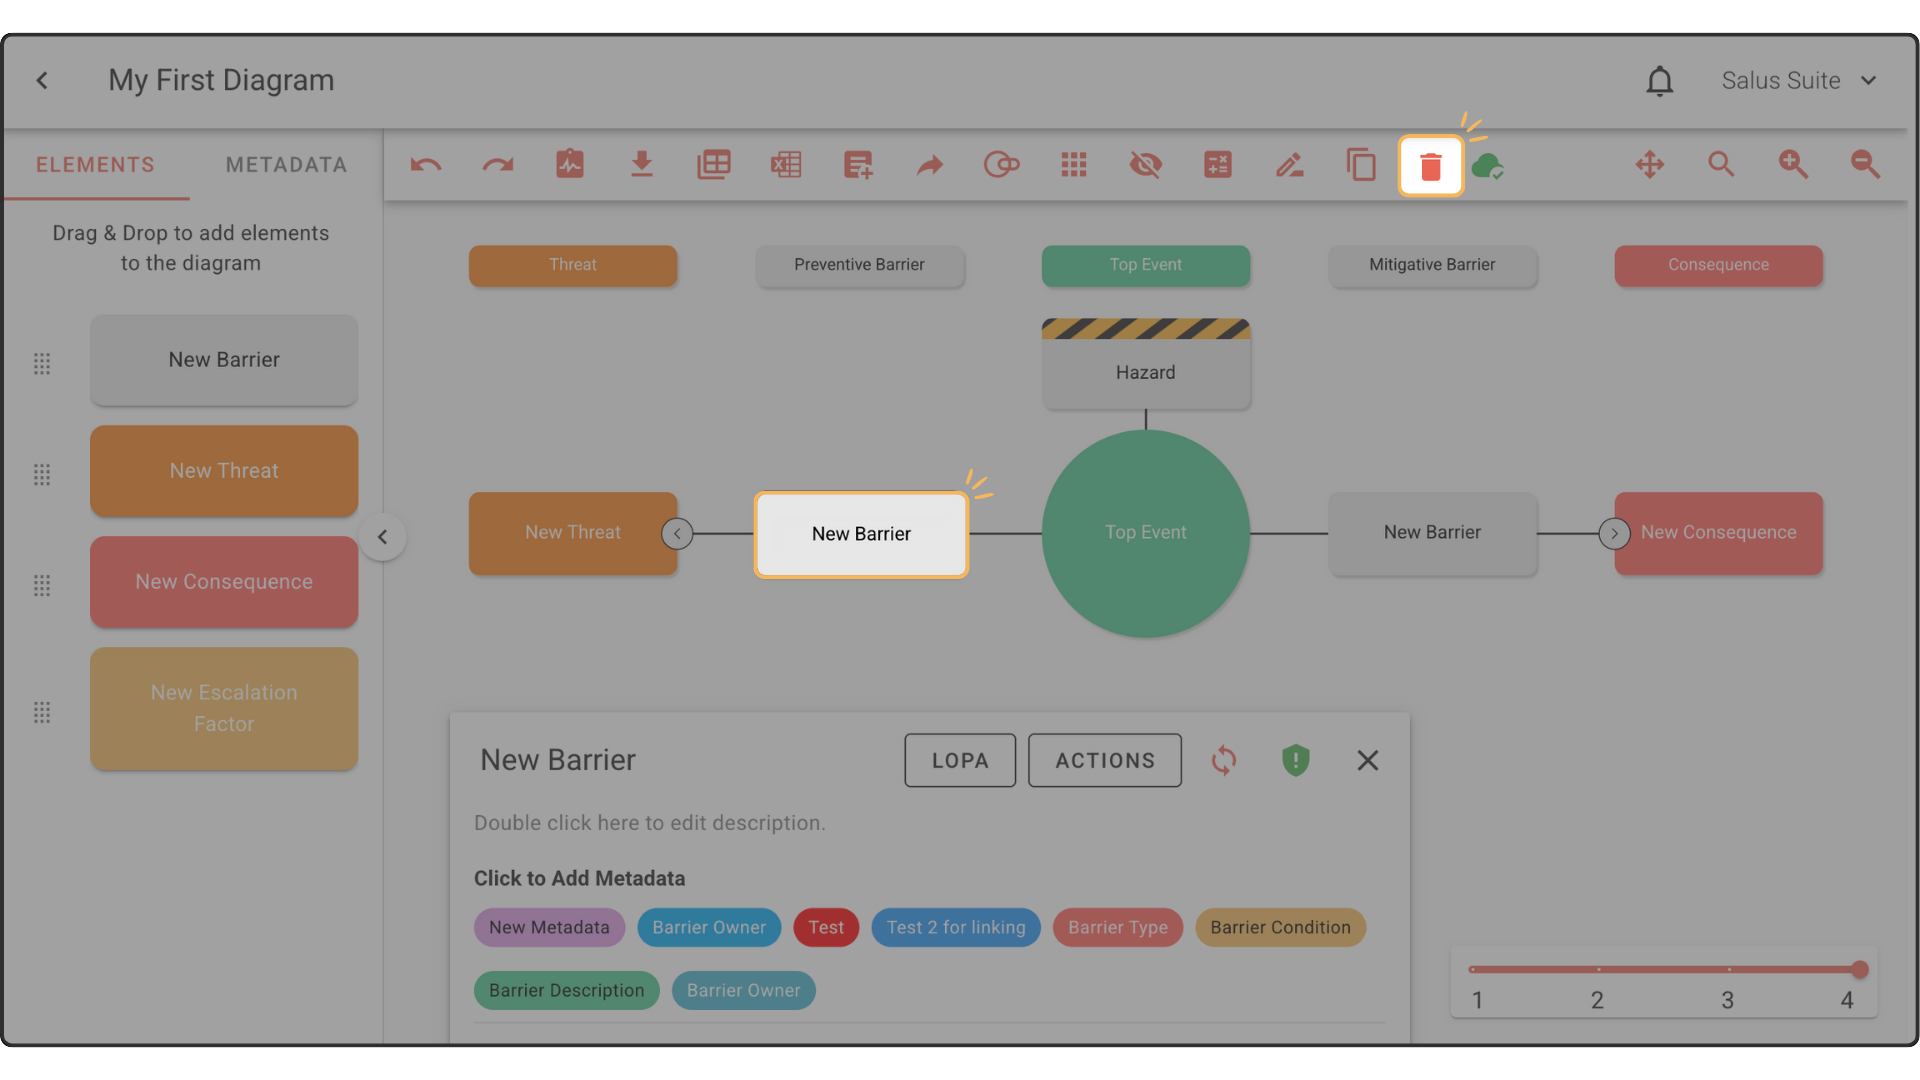
Step 4: To delete an element, double-click it, then click the trash can icon in the toolbar. This also removes any child elements.
Step 5: To clone an element, double-click it and click the copy icon in the toolbar (or press Ctrl+D).