API Keys
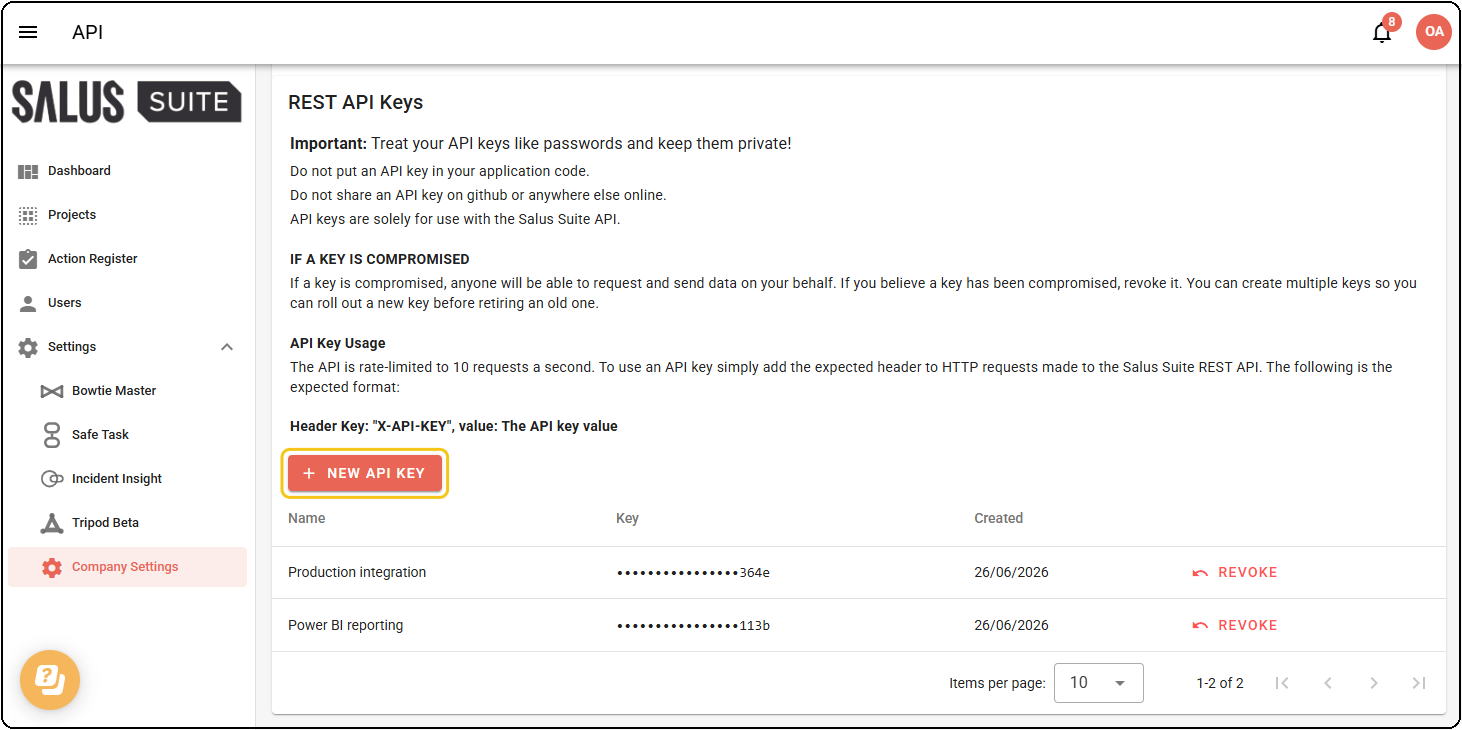
Open the REST API Keys page from Settings > Company Settings > API. The API tab only appears when API access is enabled for your organisation.
Once you have a key, see Getting Started for how to send it with each request.
Create an API key
Step 1: Click NEW API KEY.
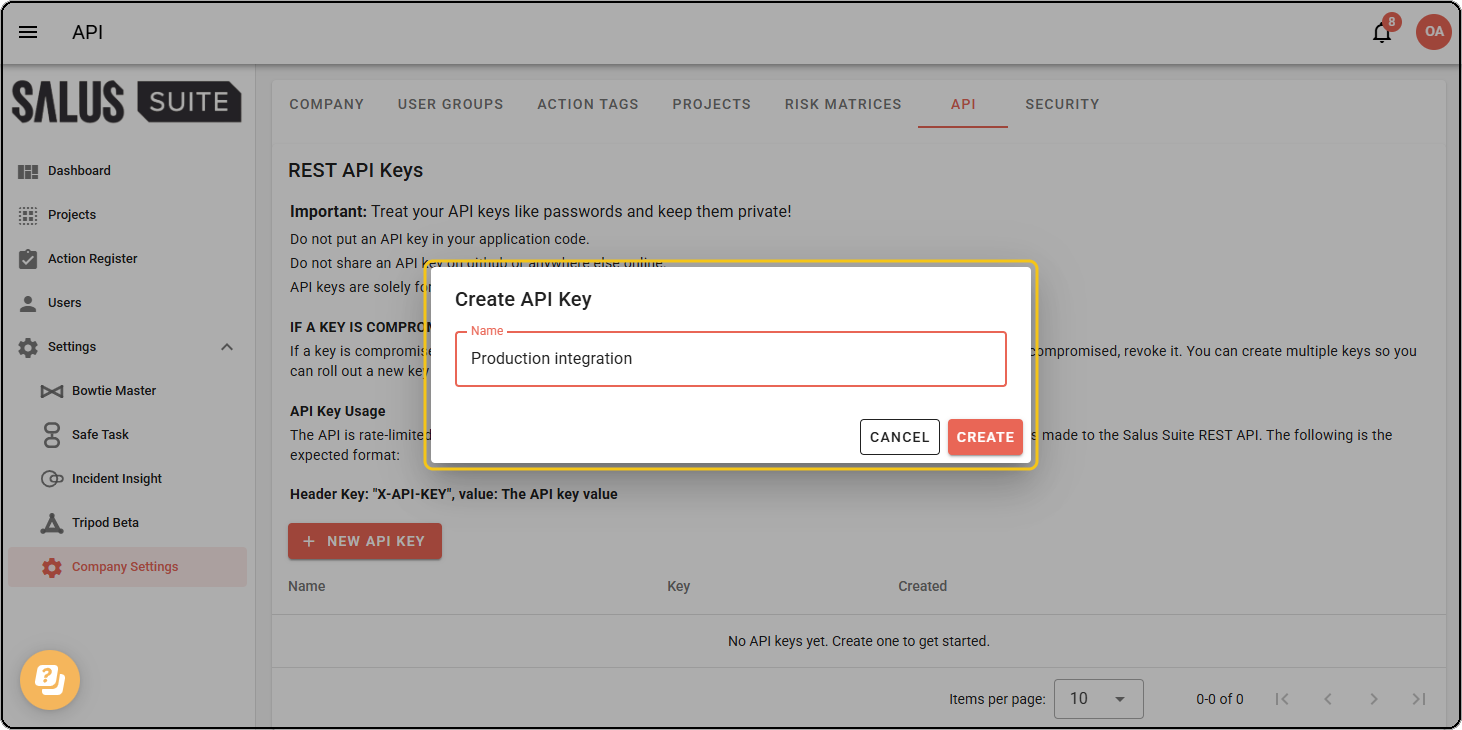
Step 2: Enter a name that identifies where the key is used, for example “Production integration”.
Step 3: Set Permission to either Read Only or Read & Write.
Step 4: Choose a user in Actor. Changes made with this key are recorded against this user as the author in diagrams, actions and elsewhere. Only Organisation Admins can be chosen. Click CREATE.
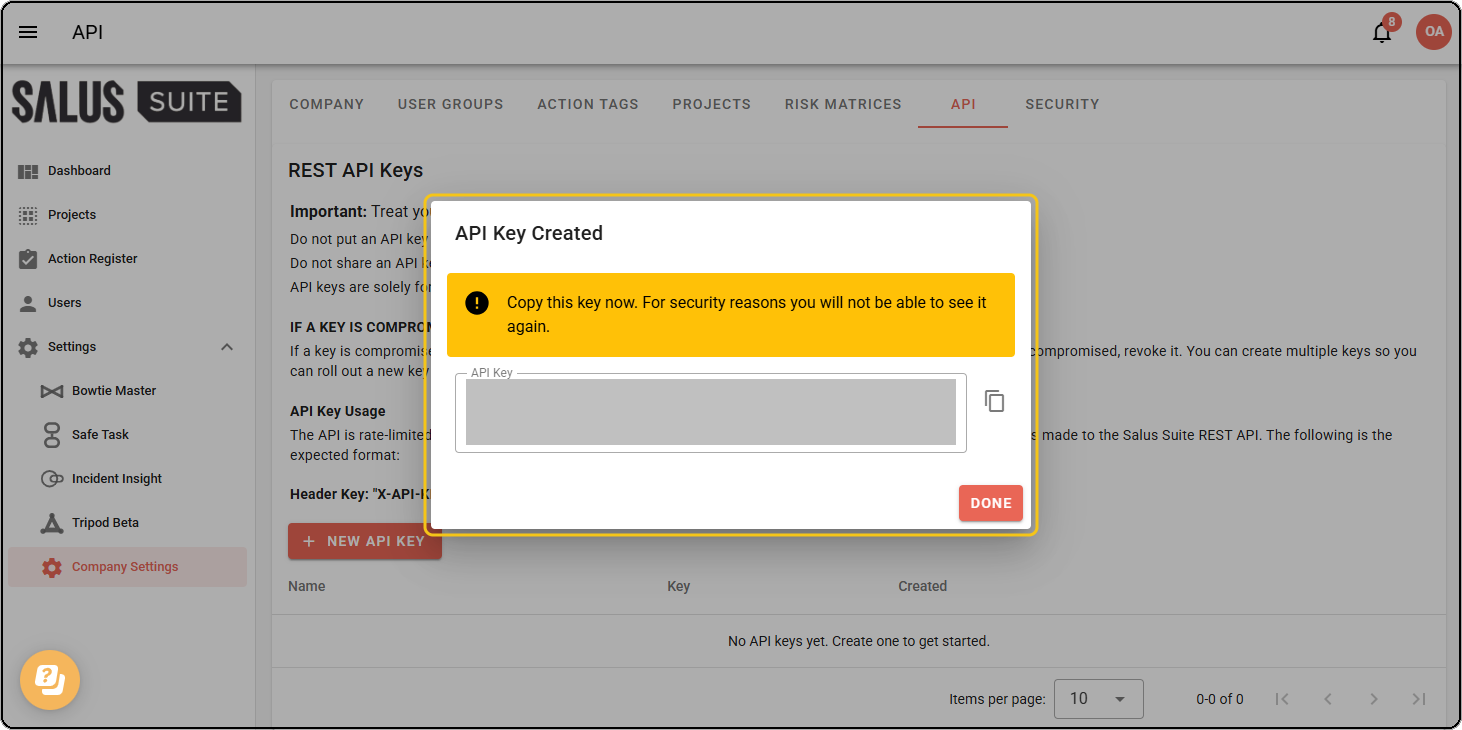
Step 5: Copy the key and store it somewhere safe, then click DONE. For security the full key is shown only once - you cannot view it again after closing this dialog.
Key permissions
Every key is either Read Only or Read & Write. You choose this when you create the key and it cannot be changed afterwards - to change a key’s permission, revoke it and create a new one.
- Read Only keys can retrieve data. Use these for reporting and dashboard integrations that never need to change anything.
- Read & Write keys can also create, update and delete data.
A Read Only key that attempts to create, update or delete receives a 403 Forbidden response.
Change a key’s actor
Every key acts as one Organisation Admin. Unlike the permission, you can change this user at any time.
Step 1: Find the key in the list, click the three dots icon at the end of its row, then click CHANGE ACTOR.
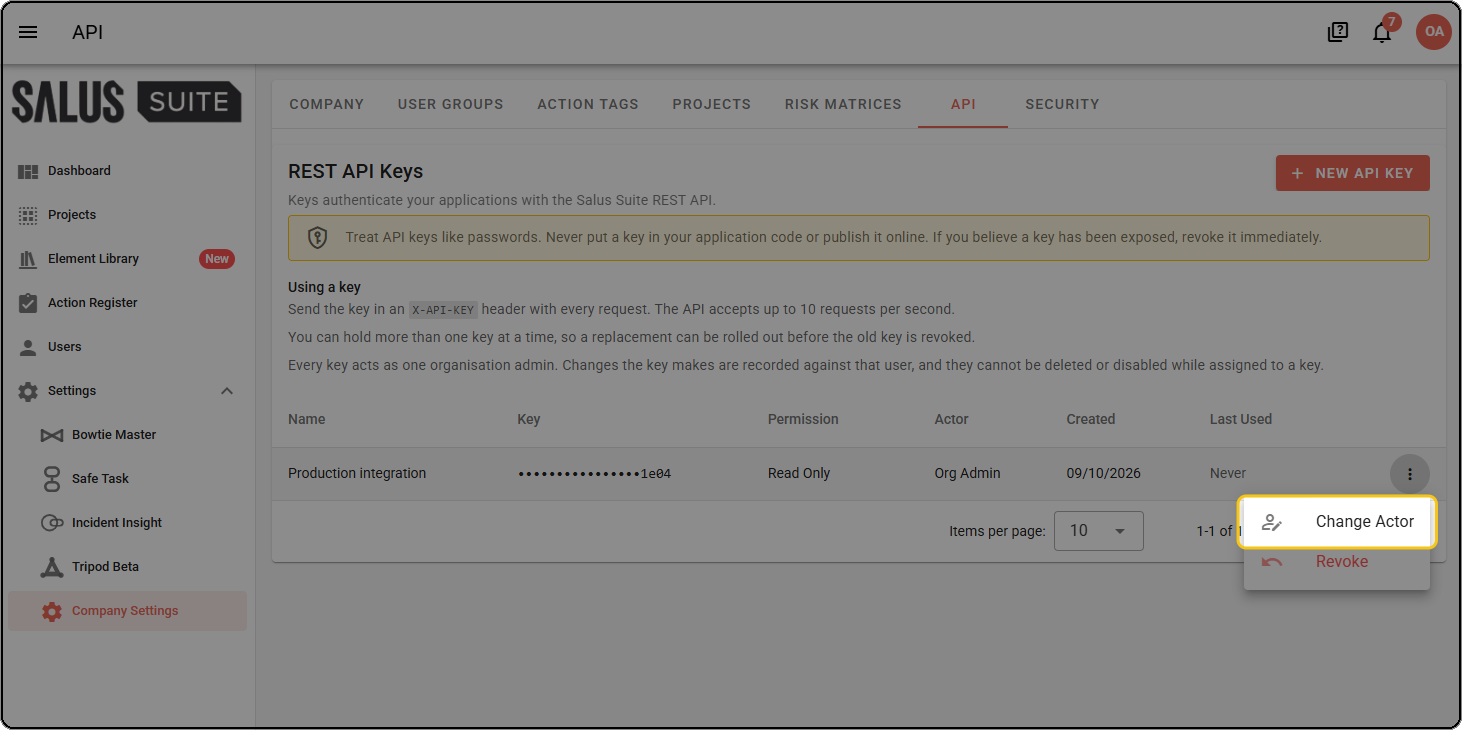
Step 2: Choose the new user in Actor, then click SAVE.
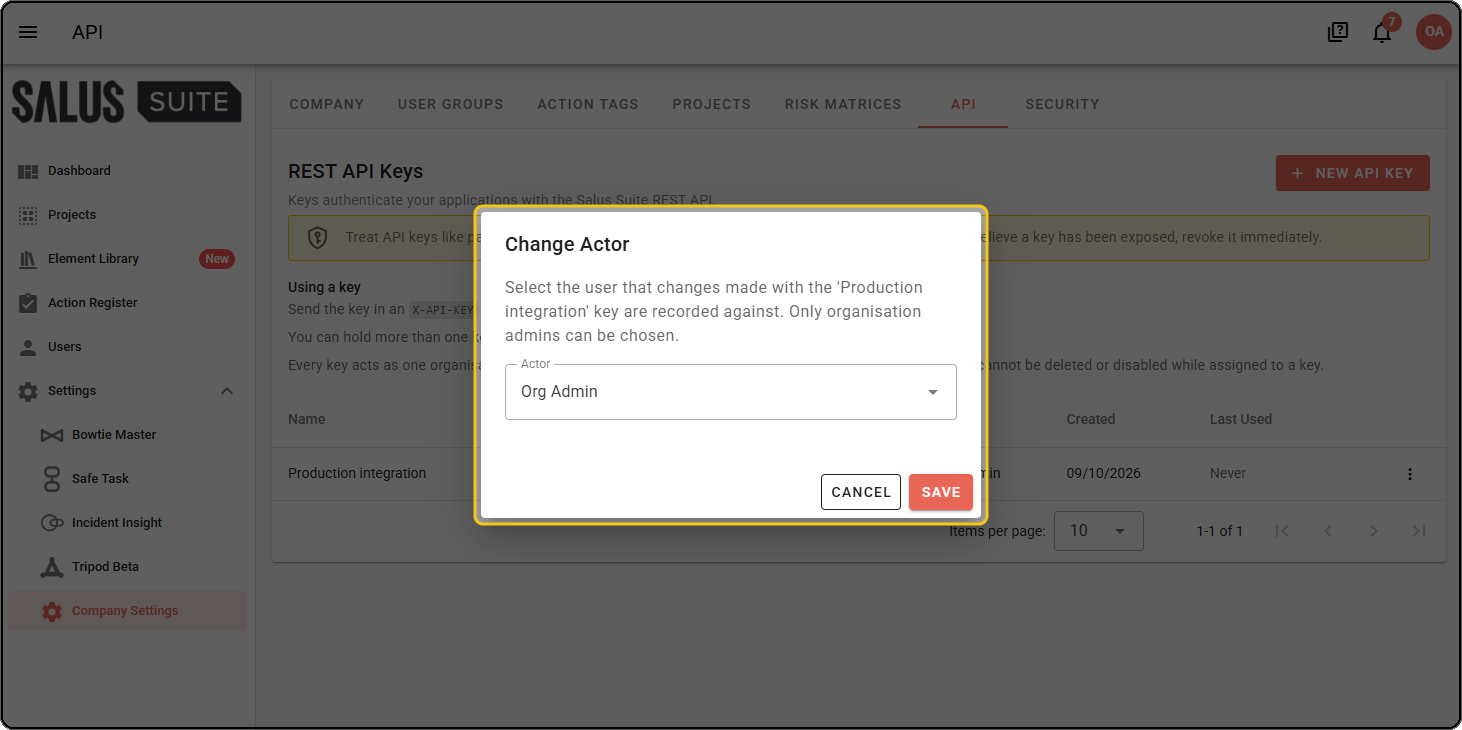
A user assigned to an API key cannot be deleted or disabled. Revoke the key or change its actor first.
Revoke an API key
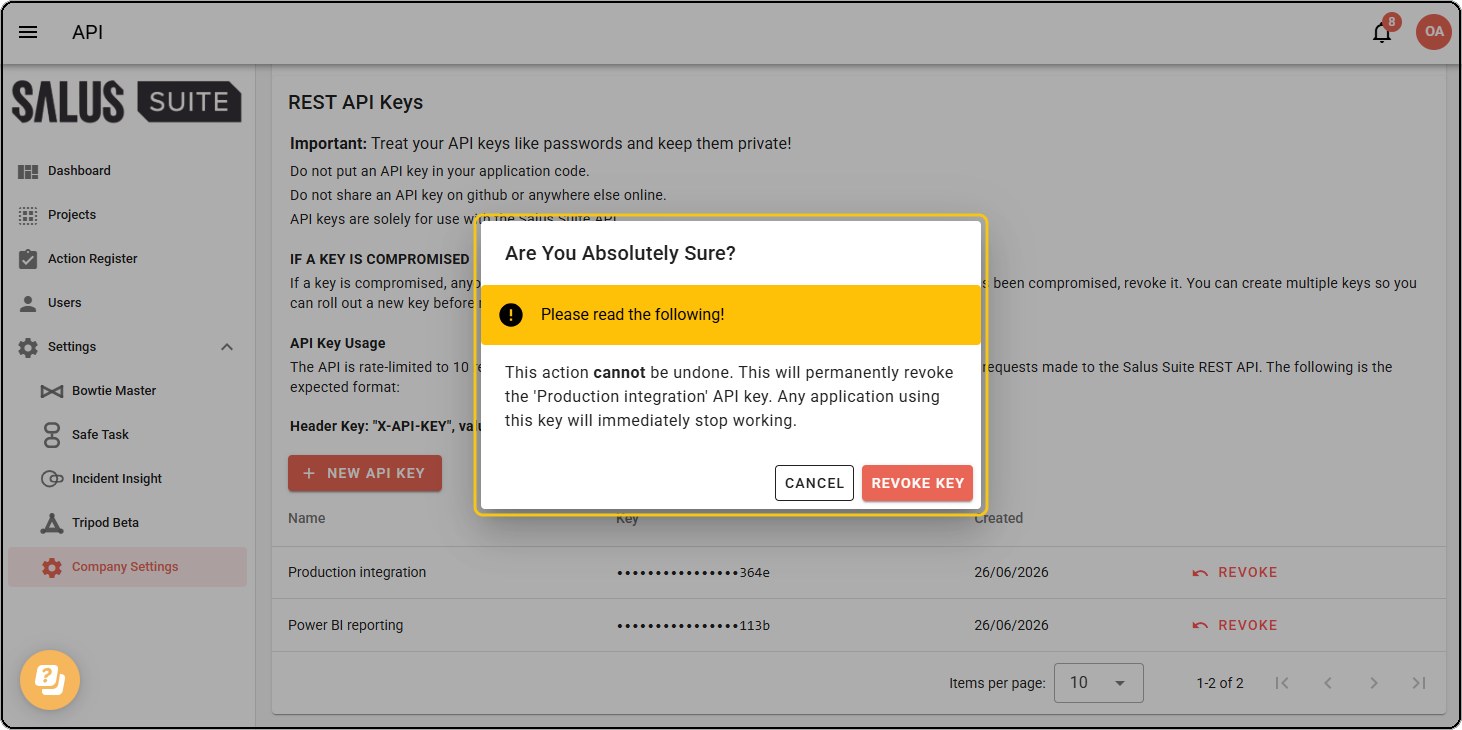
Revoke a key when it is no longer needed or you believe it has been compromised. Any application using the key stops working immediately.
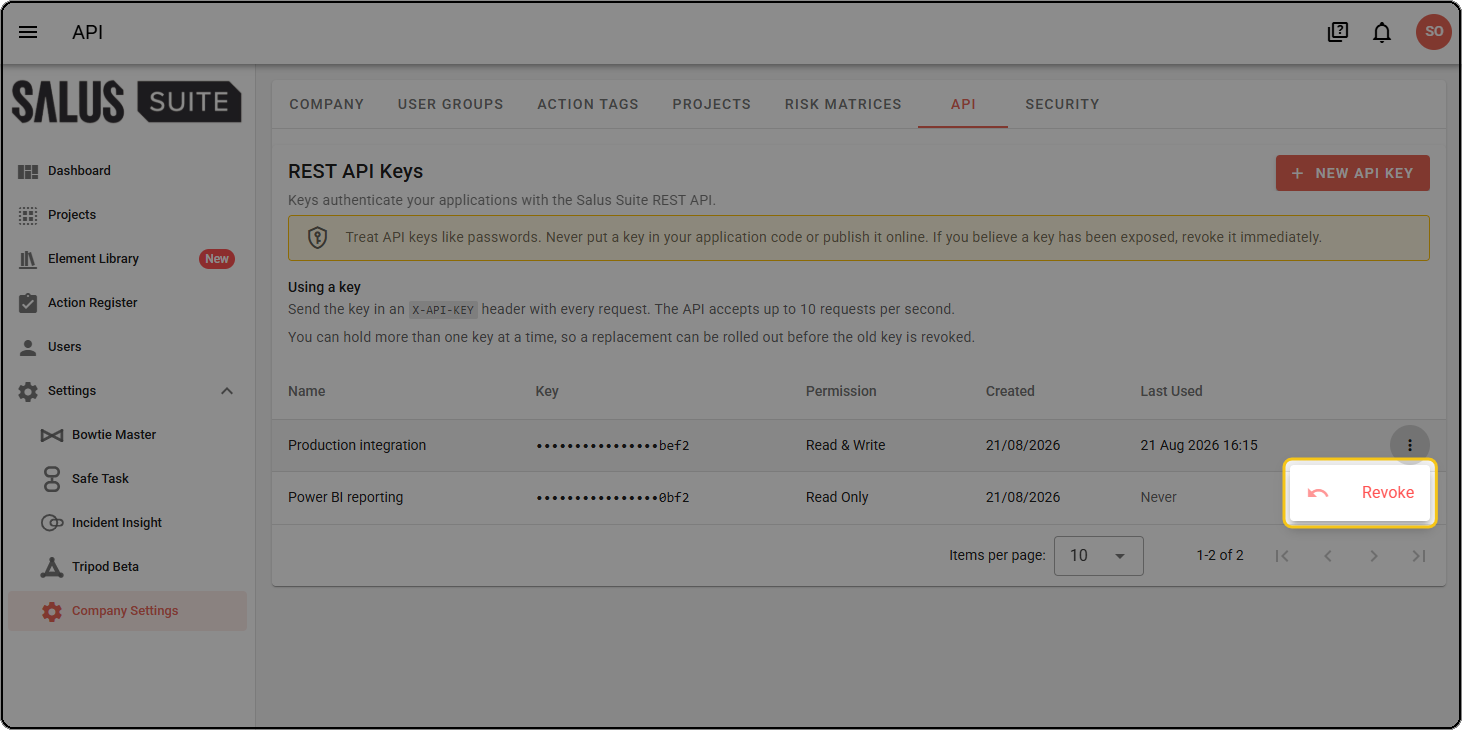
Step 1: Find the key in the list, click the three dots icon at the end of its row, then click REVOKE.
Step 2: Click REVOKE KEY to confirm.
Rotate a key
To replace a key without downtime, create a new key first and update your applications to use it. Once everything works with the new key, revoke the old one.